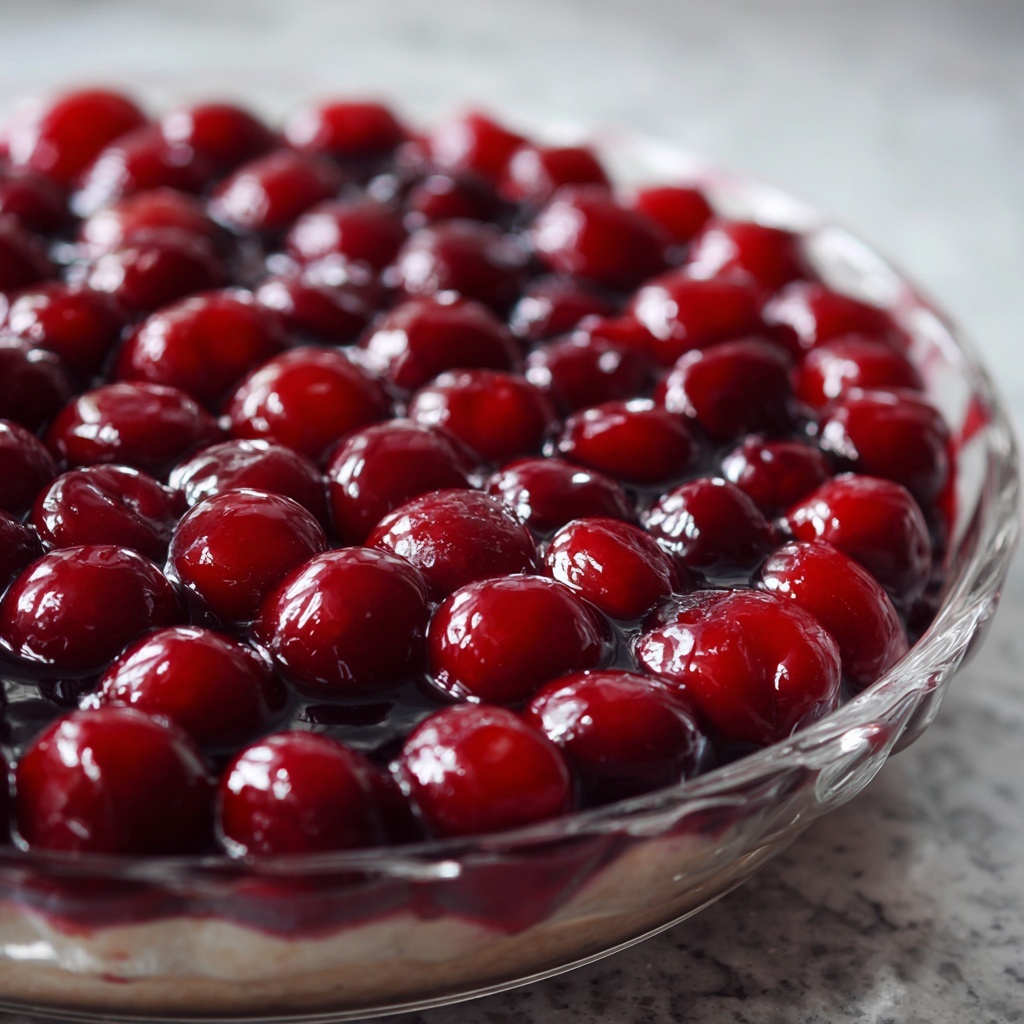
If you have ever dreamed of capturing the essence of summer cherries in a luscious, perfectly textured dessert topping, this Homemade Cherry Pie Filling Recipe is your new best friend. It combines ripe, juicy cherries with just the right amount of sweetness and a touch of thickening magic to create a filling that is bursting with flavor and exactly what any cherry pie, tart, or dessert needs to shine. Whether you are starting with fresh-picked cherries or frozen ones, this recipe is both simple and rewarding, making it the ultimate go-to for those who love a classic, comforting cherry treat crafted from scratch.
Ingredients You’ll Need
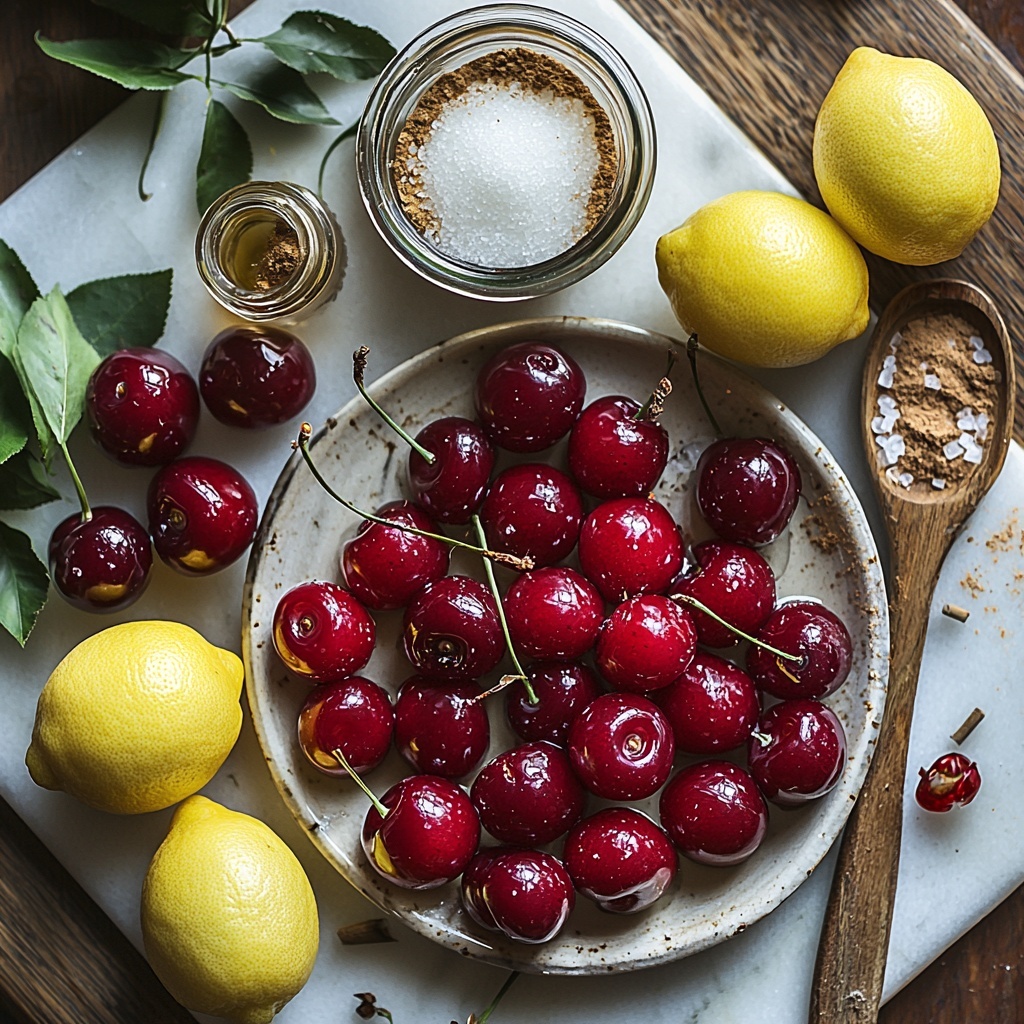
Getting your ingredients right is the secret to nailing this recipe every time. Each component plays an essential role — from the fresh or frozen cherries providing the star flavor and vibrant color, to the cornstarch that ensures the perfect thick texture you expect in a pie filling.
- 4 cups pitted cherries (fresh or frozen): The heart of your filling, delivering natural sweetness and beautiful color.
- ¾ cup granulated sugar: Balances the tartness of cherries and sweetens the filling just right.
- ¼ cup cornstarch: A simple thickening agent that gives your pie filling a silky, luscious texture.
- 1 tablespoon lemon juice: Adds brightness and preserves the cherries’ vivid color during cooking.
- ⅛ teaspoon almond extract (optional): Deepens the flavor with a subtle nutty note that complements cherries beautifully.
- ¼ teaspoon ground cinnamon (optional): A warm hint of spice that adds complexity without overpowering the fruit.
- ¼ cup water (or cherry juice if using frozen cherries): Helps dissolve the sugar and allows the filling to cook evenly.
- Pinch of salt: Enhances all the flavors and balances the sweetness perfectly.
How to Make Homemade Cherry Pie Filling Recipe
Step 1: Combine Dry Ingredients and Liquid
Begin by whisking together the granulated sugar, cornstarch, pinch of salt, and water in a medium saucepan until smooth and lump-free. This step ensures that the thickener and sugar dissolve completely before adding cherries, setting the stage for a silky filling without any gritty surprises.
Step 2: Add Cherries and Lemon Juice
Stir in the pitted cherries and fresh lemon juice to the saucepan. The lemon juice not only amplifies the cherry flavor but also helps maintain their bright red hue during the cooking process, which is crucial for an appealing final dessert.
Step 3: Cook Over Medium Heat
Place the saucepan over medium heat and gently stir the mixture constantly. Stay patient as the mixture heats – after about 8 to 10 minutes, it will begin to bubble and thicken, signaling that your homemade cherry pie filling is coming together perfectly. If you’re working with frozen cherries, extend cooking by a few minutes to allow excess moisture to evaporate and achieve that ideal consistency.
Step 4: Finish with Flavor Enhancers
Once thick and luscious with tender cherries, remove the pan from heat. Stir in the optional almond extract and ground cinnamon now for an extra flavor dimension that makes this filling truly memorable.
Step 5: Cool Before Using
Allow your homemade cherry pie filling to cool to room temperature before filling your pie crust or storing. Cooling ensures the filling thickens further and stops the cooking process, preventing sogginess in your pie.
How to Serve Homemade Cherry Pie Filling Recipe
Garnishes
For a finishing touch, sprinkle a light dusting of powdered sugar or a few fresh mint leaves over desserts featuring this filling. A dollop of freshly whipped cream or a scoop of vanilla ice cream provides a cool, creamy contrast that makes every bite heavenly.
Side Dishes
This cherry filling pairs beautifully with flaky pastries, buttery shortbread cookies, or even as a topping for pancakes and waffles. Its bright, fruity sweetness also complements rich desserts like cheesecake or pound cake, adding a refreshing zip.
Creative Ways to Present
Why stop at pies? Use your homemade cherry pie filling to create vibrant parfaits layered with Greek yogurt and granola, swirl it into vanilla pudding for a quick dessert upgrade, or tuck it inside puff pastry turnovers for delightful handheld treats that wow every time.
Make Ahead and Storage
Storing Leftovers
Keep any leftover cherry pie filling refrigerated in an airtight container for up to five days. This makes it easy to whip up last-minute desserts or add a fruity twist to breakfasts throughout the week.
Freezing
If you want to enjoy your homemade cherry pie filling for longer, it freezes beautifully for up to three months. Just spoon it into freezer-safe containers or bags, thaw in the fridge overnight when ready to use, and stir before incorporating into your recipes.
Reheating
Reheat your frozen or refrigerated cherry filling gently in a saucepan over low heat. Stir frequently to bring it back to life without burning or breaking down the consistency. If it seems too thick, a splash of water or juice will help restore its perfect texture.
FAQs
Can I use frozen cherries to make this Homemade Cherry Pie Filling Recipe?
Absolutely! Frozen cherries work wonderfully and are a great option when fresh cherries aren’t available. Just remember to cook your filling a few minutes longer to reduce extra liquid from the frozen fruit and achieve that perfect thickness.
Is it possible to make this recipe without cornstarch?
Cornstarch is key for thickening the filling to pie-perfect consistency. While you might try alternatives like arrowroot or tapioca starch, using cornstarch ensures the cleanest flavor and smoothest texture.
What is the purpose of adding lemon juice?
Lemon juice brightens the flavor, balancing the sweetness and enhancing the cherries’ natural tartness. It also helps keep the cherry filling’s lovely red color vibrant and fresh-looking after cooking.
Can I omit the almond extract and cinnamon?
Yes, these ingredients are optional and serve to add extra layers of flavor. If you prefer a more straightforward cherry taste, feel free to leave them out and still enjoy a wonderfully tasty homemade cherry pie filling.
How long does this cherry pie filling last in the refrigerator?
Stored properly in an airtight container, this filling stays fresh for up to five days in the fridge. Beyond that, it’s best to freeze it to maintain quality and prevent spoilage.
Final Thoughts
Making your own cherry pie filling is a joyful experience that turns a classic dessert staple into something truly special with just a handful of simple ingredients and a little love in the kitchen. This Homemade Cherry Pie Filling Recipe offers vibrant cherries, perfect texture, and flexible flavor options that guarantee a delicious result every time. I can’t wait for you to give it a try and discover just how easy and rewarding homemade cherry magic can be!
Print
Homemade Cherry Pie Filling Recipe
- Prep Time: 5 minutes
- Cook Time: 10 minutes
- Total Time: 15 minutes
- Yield: About 3 cups (enough for one 9-inch pie)
- Category: Dessert
- Method: Stovetop
- Cuisine: American
- Diet: Vegan, Gluten Free
Description
This Homemade Cherry Pie Filling is a simple and delicious mixture of pitted cherries cooked with sugar, cornstarch, and a hint of lemon juice, perfect for pies, tarts, or other desserts. Featuring options to add almond extract and cinnamon, this versatile filling can be made with fresh or frozen cherries and is vegan and gluten-free.
Ingredients
Cherry Pie Filling Ingredients
- 4 cups pitted cherries (fresh or frozen)
- ¾ cup granulated sugar
- ¼ cup cornstarch
- 1 tablespoon lemon juice
- ⅛ teaspoon almond extract (optional)
- ¼ teaspoon ground cinnamon (optional)
- ¼ cup water (or cherry juice if using frozen cherries)
- Pinch of salt
Instructions
- Prepare the Mixture: In a medium saucepan, combine the sugar, cornstarch, salt, and water. Whisk until the mixture is smooth and free of lumps to ensure an even thickening process.
- Add Cherries and Lemon Juice: Stir in the pitted cherries and lemon juice into the saucepan mixture. The lemon juice enhances the flavor and balances the sweetness.
- Cook the Filling: Place the saucepan over medium heat and cook, stirring constantly to prevent sticking, until the mixture bubbles and thickens. This usually takes about 8–10 minutes. If you are using frozen cherries, extend the cooking a few minutes longer to reduce extra liquid.
- Finish the Flavoring: Once thickened and cherries are tender, remove the saucepan from the heat. Stir in the optional almond extract and ground cinnamon for added depth of flavor.
- Cool and Store: Allow the cherry filling to cool to room temperature. Use it immediately in your favorite pies, tarts, or desserts, or transfer it to an airtight container and refrigerate for up to 5 days. You can also freeze the filling for up to 3 months, thawing it in the fridge before use.
Notes
- This recipe fills one 9-inch pie with about 3 cups of filling.
- For a smoother texture, gently mash some cherries while cooking.
- You can freeze the filling for up to 3 months; thaw in the refrigerator before using.
- If using frozen cherries, consider using cherry juiceinstead of water to enhance flavor.

