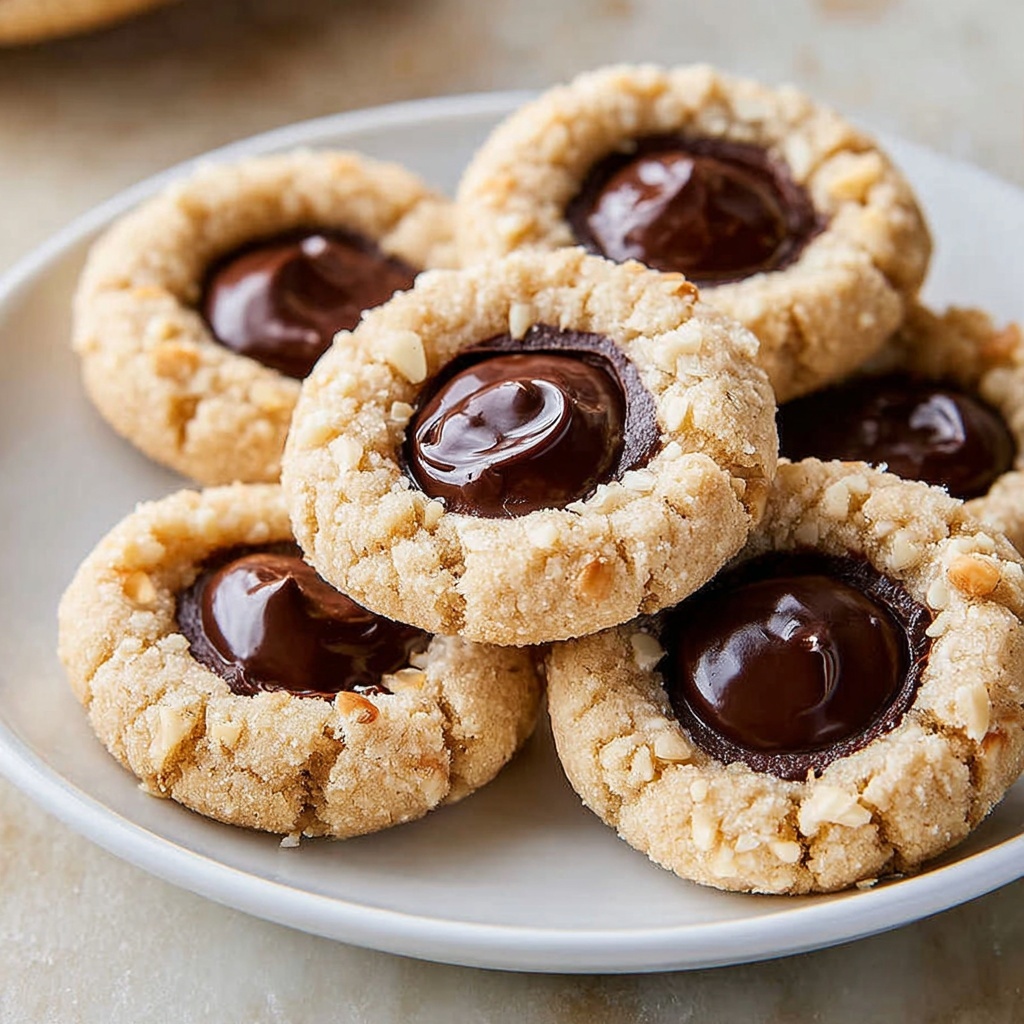
If you are on the lookout for a decadent yet delightfully simple treat, this Chocolate Hazelnut Thumbprint Cookies Recipe is an absolute showstopper. These cookies combine the rich, velvety embrace of cocoa-infused dough with a luscious swirl of chocolate hazelnut spread nestled in every thumbprint. The crunchy hazelnut coating adds just the right amount of texture, creating a perfect balance that will make these cookies disappear in no time at all. Whether you’re baking for a special occasion or just to satisfy a sweet craving, this recipe will quickly become a beloved go-to in your kitchen.
Ingredients You’ll Need
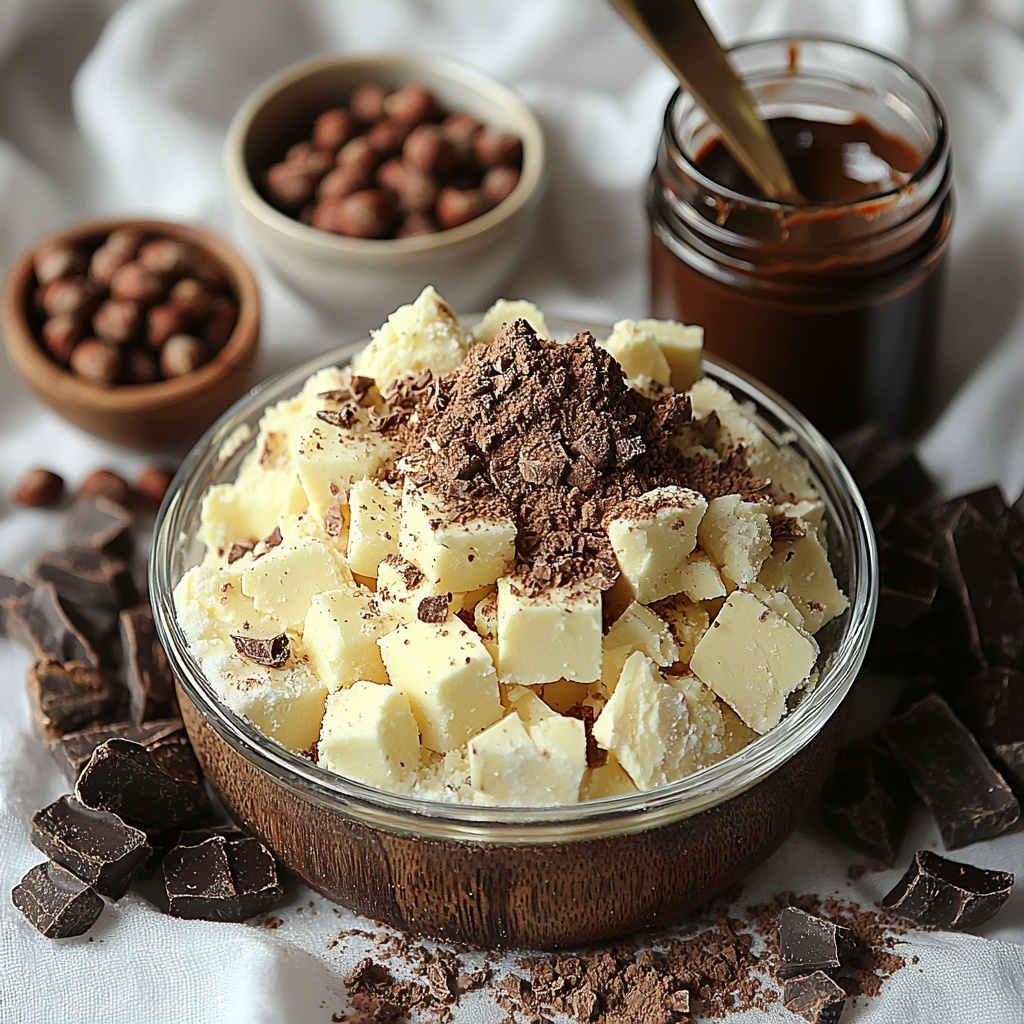
Gathering these ingredients is straightforward, but each one plays a crucial role in building the deep flavors and textures that make these cookies unforgettable. From creamy butter to the nutty crunch of hazelnuts, every component adds a magic touch to the final product.
- Unsalted butter (1 cup, softened): Provides richness and tenderness to the cookie dough.
- Granulated sugar (2/3 cup): Adds sweetness and helps create a delicate crumb.
- Vanilla extract (2 teaspoons): Enhances the overall flavor depth with warm, aromatic notes.
- All-purpose flour (2 cups): Forms the base of the dough, giving structure and substance.
- Cocoa powder (1/2 cup): Brings a deep chocolate flavor and a beautiful dark color to the dough.
- Salt (1/2 teaspoon): Balances sweetness and intensifies the chocolate taste.
- Finely chopped hazelnuts (1/2 cup): Used for rolling the dough balls, adding a crisp and nutty texture.
- Chocolate hazelnut spread (1/2 cup): The star filling inside each thumbprint, rich and creamy.
- Extra whole hazelnuts (optional): For garnish, offering a pretty and crunchy finishing touch.
How to Make Chocolate Hazelnut Thumbprint Cookies Recipe
Step 1: Prepare Your Oven and Baking Sheets
Start by preheating your oven to 350°F (175°C), ensuring a perfect baking environment. Line two baking sheets with parchment paper; this helps prevent sticking and makes cleanup a breeze.
Step 2: Cream Butter and Sugar
In a large mixing bowl, beat the softened butter and granulated sugar together until they become light and fluffy. This step is key for a tender cookie texture. Then, stir in the vanilla extract to give your cookies that warm, inviting aroma.
Step 3: Combine Dry Ingredients
In a separate bowl, whisk together all-purpose flour, cocoa powder, and salt. Gradually add this dry mixture into the butter-sugar blend, mixing just until it forms a uniform dough without overworking.
Step 4: Shape and Coat the Dough
Roll the dough into 1-inch balls, making sure each one is evenly sized for consistent baking. Next, roll each ball in the finely chopped hazelnuts, coating them entirely. This layer adds a lovely crunch that contrasts beautifully with the soft interior.
Step 5: Create Thumbprint Indentations
Place the coated dough balls on the prepared baking sheets, leaving room for them to spread slightly. Using your thumb, gently press into the center of each ball to create a small well. This indentation will hold the delicious filling later.
Step 6: Bake and Fill
Bake the cookies in the preheated oven for 12 to 14 minutes. When they come out, they should look set but still soft. While they are warm, spoon a bit of chocolate hazelnut spread into each thumbprint indentation, letting the spread melt slightly for extra indulgence.
Step 7: Cool Before Serving
Allow the cookies to cool completely on a wire rack so they firm up just right and the filling sets. Once cooled, these beauties are ready to delight your taste buds.
How to Serve Chocolate Hazelnut Thumbprint Cookies Recipe
Garnishes
Adding an extra whole hazelnut on top of the chocolate filling brings a lovely visual appeal and an extra crunch with every bite. You could also dust the cookies lightly with powdered sugar for an elegant touch that invites a festive feeling.
Side Dishes
These cookies pair beautifully with a warm cup of coffee, tea, or even a glass of cold milk. Their rich, nutty chocolate flavor complements creamy beverages and makes snack time feel like a true treat moment.
Creative Ways to Present
For a fun twist, arrange these cookies on a decorative platter with fresh berries or edible flowers for a stunning presentation. They also work wonderfully tucked into gift boxes or jars, making them a heartfelt homemade gift for friends and family.
Make Ahead and Storage
Storing Leftovers
Keep any leftover cookies in an airtight container at room temperature for up to five days. This keeps them moist and maintains the chocolate hazelnut spread’s creamy texture without drying out the dough.
Freezing
If you want to enjoy these cookies later, you can freeze the baked and cooled cookies in an airtight container or freezer bag for up to three months. When ready to eat, just thaw them at room temperature – the texture and flavor remain fantastic.
Reheating
To bring back that freshly baked vibe, warm the cookies slightly in a low oven or microwave for a few seconds. This softens the spread and intensifies the chocolate and hazelnut aromas, creating an irresistible treat.
FAQs
Can I use almond butter instead of chocolate hazelnut spread?
While you can substitute almond butter, the unique chocolate-hazelnut combo gives these cookies their signature flavor. Using almond butter will create a different but still tasty result, just less chocolatey.
Are these cookies gluten-free?
This Chocolate Hazelnut Thumbprint Cookies Recipe calls for all-purpose flour, so it is not gluten-free as written. To make a gluten-free version, you could experiment with gluten-free flour blends, but results may vary.
Can I make these cookies without rolling them in hazelnuts?
Yes, you can skip the hazelnut coating for a smoother texture if desired, but the nuts add a delightful crunch and nutty flavor that truly elevate the cookie experience.
What’s the best way to ensure the thumbprints stay during baking?
Press gently but firmly when making the indentations and don’t fill them before baking, as filling early may cause overflow. Filling the thumbprints while the cookies are warm helps keep the filling nestled perfectly.
Can I use store-bought hazelnut spread or make my own?
Both options work wonderfully. Store-bought spreads like Nutella are convenient and delicious, but homemade chocolate hazelnut spread can add a personal touch if you enjoy making your own pantry staples.
Final Thoughts
These Chocolate Hazelnut Thumbprint Cookies Recipe are a delightful way to bring a little luxury into your everyday routine. With their soft cocoa dough, nutty crunch, and creamy chocolate filling, they truly capture the joy of homemade baking. I warmly encourage you to try them out and share the love with those around you – I promise, they’ll be asking for the recipe in no time!
Print
Chocolate Hazelnut Thumbprint Cookies Recipe
- Prep Time: 12 minutes
- Cook Time: 14 minutes
- Total Time: 26 minutes
- Yield: 24 cookies
- Category: Dessert
- Method: Baking
- Cuisine: American
Description
Delight in these rich and tender Chocolate Hazelnut Thumbprint Cookies, featuring a buttery cocoa dough rolled in crunchy hazelnuts and filled with luscious chocolate hazelnut spread. Perfect for chocolate lovers and nut enthusiasts alike, these cookies combine a satisfying texture with a burst of flavor in every bite.
Ingredients
Cookie Dough
- 1 cup unsalted butter (softened)
- 2/3 cup granulated sugar
- 2 teaspoons vanilla extract
- 2 cups all-purpose flour
- 1/2 cup cocoa powder
- 1/2 teaspoon salt
Coating and Filling
- 1/2 cup finely chopped hazelnuts (for rolling)
- 1/2 cup chocolate hazelnut spread (like Nutella)
- Extra whole hazelnuts (optional for garnish)
Instructions
- Preheat Oven and Prepare Baking Sheets: Preheat your oven to 350°F (175°C) and line two baking sheets with parchment paper to prevent sticking and ensure even baking.
- Cream Butter and Sugar: In a mixing bowl, cream together the softened butter and granulated sugar until the mixture is light and fluffy. Then, add the vanilla extract and mix well to combine the flavors.
- Mix Dry Ingredients: In a separate bowl, whisk together the all-purpose flour, cocoa powder, and salt to evenly distribute the dry ingredients before incorporating them into the wet mixture.
- Combine Dry and Wet Ingredients: Gradually add the flour mixture into the butter mixture, mixing gently until a consistent dough forms without overworking to maintain tenderness.
- Form and Coat Dough Balls: Roll the dough into 1-inch balls, then carefully coat each ball in the finely chopped hazelnuts to add a delightful crunch on the outside.
- Create Thumbprints: Place the coated dough balls on the prepared baking sheets, spacing them apart. Use your thumb to press an indentation into the center of each dough ball to hold the filling.
- Bake the Cookies: Bake the cookies for 12 to 14 minutes until set but still soft. Once baked, remove them from the oven.
- Fill the Indentations: While the cookies are still warm, spoon the chocolate hazelnut spread into each thumbprint indentation, allowing the chocolate to slightly melt into the cookie surface.
- Cool and Garnish: Allow the cookies to cool completely on the baking sheets. Optionally, garnish with extra whole hazelnuts for added presentation and texture before serving.
Notes
- For extra flavor, toast the chopped hazelnuts lightly before rolling the dough balls.
- Use room temperature butter to ensure easy creaming with sugar.
- Be careful not to overbake to keep the cookies soft inside.
- Store cookies in an airtight container for up to one week for freshness.
- These cookies can be frozen after baking; thaw before filling if preferred.


